As the summer entertaining and grilling season winds down, you start thinking about the snow that’ll soon fly. If you have a deck, that means you need to take a few extra steps to prep in the fall. Wood deck additions cost an average of $14,360 according to Remodeling Magazine. Doing a little winter prep work protects that investment so you can enjoy your deck next spring without discovering damage from winter weather.
Keep reading for seven ways to prepare for winter when it comes to your deck.
1. Remove Furniture and Planters
Before you start tackling your winter prep maintenance, remove everything from your deck. If possible, store your patio furniture in a shed, garage, or other protected areas. Planters should also get packed away for the winter.
Not only is this the best option for the furniture and planters, but it can protect your deck as well. If you leave things on the deck, they can trap moisture against the wood. This can cause damage, rotting, and discoloration.
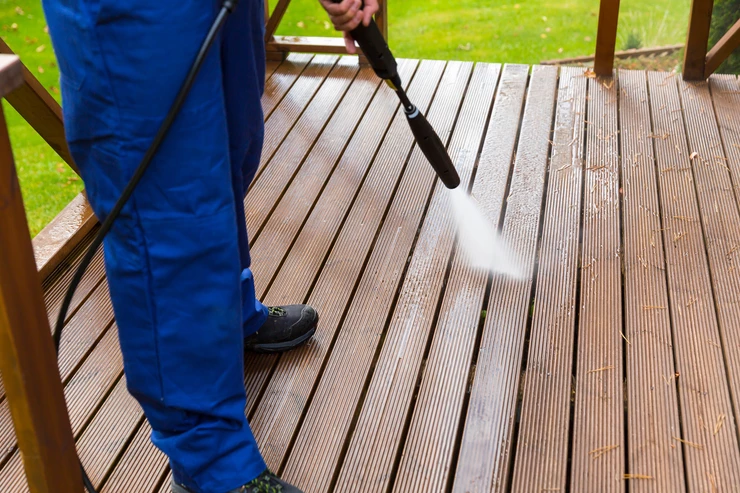
2. Clean the Deck
By the end of fall, you’re probably sick of cleaning up leaves. You don’t want to forget your deck, though. If you leave debris and dirt on the deck, it can cause discoloration on the wood and moisture buildup, which increases algae growth.
Start by sweeping the deck and removing the large chunks. Pressure washing your deck on a low-pressure setting helps remove dirt gently without gouging the wood. Look for signs of mold and mildew that need to be removed. Instead of bleach, try using vinegar and water. Scrub it onto the mold or mildew areas using a gentle bristle brush to loosen the mold and mildew, and then spray it with a hose.
You can also find commercial mold and mildew remover products. Make sure they’re designed for wood decks and follow the instructions exactly to protect the wood.
Pressure washing can help remove some of the mold and mildew. Be careful to use low pressure. It can be tempting to crank up the pressure to remove stubborn spots, but you’re more likely to damage the wood.
3. Do an Inspection
Inspecting your deck carefully helps you spot potential trouble spots before they become major issues. Add an inspection to your annual winter prep so you don’t forget to do it. Look at all parts of the deck, including the deck itself, the railing, and the stairs. Check it out from the top and from underneath the deck for signs you might miss from above.
Some signs to look for include:
- Discoloration
- Rotting
- Warping
- Cracks
- Loose boards
- Broken sections
If you’re not comfortable doing the inspection yourself, hire a professional deck company to look for signs of damage, and recommend repairs.
4. Make Repairs
If your inspection reveals damage, handle those deck repairs before winter. Simple repairs include tightening up loose boards and pounding nails back into the boards.
If you notice rotting, cracking, or other damage, you might need to replace some of the boards. Consider calling a contractor if you have a more widespread rotting problem or structural issues with the footings or joists.
5. Seal the Boards
Sealing your deck before winter adds a protective barrier that can help it come through the cold months beautifully. The sealant creates a coating over the boards and helps seal up any tiny cracks to keep moisture out of them.
In sunny climates, sealing your deck yearly might be necessary to protect it well. You can stretch that out to every two or three years in other areas.
You can test your deck to see if it’s time to reseal by putting a little water on it. If the water still beads up, the sealant is still doing its job. If the water soaks into the deck, it’s time for a new coat of sealant.
Don’t miss the window for sealing your deck if you’re due for the coating. The sealant won’t adhere properly if it’s frosty or damp. Ideally, you should apply the sealant when the temperature is between 50 and 90 degrees Fahrenheit.
If you’ve had rain recently, wait at least 24 hours before you seal the deck. Your deck needs to be cleaned well before sealing, but you also need to wait 24 hours after washing to allow the wood to dry.
6. Apply Non-Slip Surfaces
When your deck gets snowy or icy, your first instinct might be to grab salt or chemical ice melting products. While those products may work quickly, they can be damaging to your deck stain.
Adding non-slip surfaces to your deck cuts down on the chances of slipping. Non-slip strips or mats help give you traction with less need to use chemical salt removers. Pads can also protect the wood from snow and ice.
You can also apply non-stick deck paint or finish that soaks into the wood and gives it a more grippy surface. These products keep you safer while you walk on your deck in winter and may help reduce ice and snow removal needs.
Before applying the non-slip products, make sure your deck is completely clean and dry. If you trap leaves, moisture, or other things beneath the strips, it can damage the wood.
7. Remove Snow Carefully
Keeping the snow scooped off of your deck can minimize how much moisture soaks into the wood. It also makes it easier to walk across your deck safely. For light snow, you can often use a broom or leaf blower to get rid of it.
When you shovel the snow, run the shovel along the boards instead of against them. This reduces the risk of gouging the boards with the shovel. A shovel with a soft or rubberized edge also helps protect your deck.
Prepare for the Winter on Your Deck
Prepare for the winter before the temperatures drop and the snow flies to protect your deck. Preventative maintenance can help your deck make it through the harsh weather in good shape.
If you need help cleaning, sealing, or repairing your deck before winter, contact us to discuss the options.